|
|
|
Badland Bumpers SliderZ (Welded On) on a 2000 4runner
*Writeup: Not Completely finish
These are some rock sliders that I ordered from Jeff Kellson of Badland Bumpers. Thanks to Corey's recommendation. Jeff is a cool guy to deal with, very knowledgeable and helpful. You can get the sliderz "fabbed" up as you like it. Just let him know the details and send some pics of your rig. Sorry did not have the chance to take some pic before I painted and installed them. The overall length of the sliderz are 65 inches. I spent $300 shipped. I was planning to get similar to Corey's set up (removable sliderz) for $50 more. However, I was told by Jeff, that I had to weld it on almost to perfect. Knowing the local welders here, I do not think they can be that perfect because I know that they have not done this kind of work before. So I opted for the regular sliderz, straight weld on. They are perfect, they flush right into the 4runner stock fender flares and the tubes are not to big. Total amount spent is approximately $400 including the labor to weld it and some other accessories (paint, primer, sand paper, stick on sand paper, gussets, and the flange)
Painting: This is very easy project to do on your own. It took me 4 days to paint both because I took my time. I made sure that the paint is really dry before sanding or painting another coat. I went to Pep Boys to get some primer (2 cans for $8.00). I went to Home Depot to get some Rustoleum Flat black paint (3 cans for $15.00) and sand paper ($1.00) to sand it down.

1. To keep the sliders upright for painting. I used my jack stands and put 2 tubes to hold the sliderz and covered the stands with some plastic bags. This made it really easy to paint the sliserz. You can also hang it by using some small clamps to clamp the legs. I opted for the stands because it game me more stability.
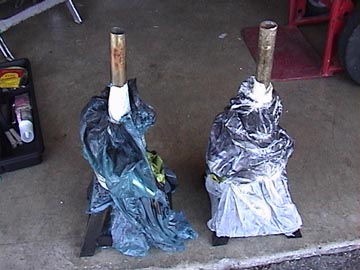
2. Before paitning, make sure that you sand the tubes really good to get rid of the oils and grime. After sanding, wipe the tubes with some wet towel so you can get rid of the particles left from sanding. Then, let it dry by waiting for it to dry or by wiping it with a fresh dry towel.
3. After prepping the tubes, priming came next. I used a primer first so that it will not chip later on. Make sure you prime it. I used 1 can of primer each side to get a real good coat. (1 can was about 4 coat). For every coat, I sanded the tubes to get it smooth before the next coat. Be sure to also wipe the small particles left from sanding before going to the next step.
4. After the priming, sanding, and wiping. Spray Painting came next. I painted my sliderz inside the garage to insure that no wind can intere witht the painting. Make sure there is no wind at all to insure a proper coating. Also, it is very important that you get proper ventilation. As you know, the smell of chemicals is bad for you. This is the step that took the longest because the paint does not dry as fast as the primer. I think the spray painting took me 3 days. This includes the multiple coats and fry time in between. No sanding on this step. I guess it all depends on your preference how much coat you want. I opted for at least 3 to 4 coats to get a good painted surface.
5. After the 4th day, everything was done. All I had to do is get it welded.
Welding: I looked around my area( Bay Area, California) for a good welder shop. I went to 3 different places and asked how much will it cost me and if they know what they are doing. I went to a muffler shop that specializes on custom exhaust, they quoted me $375 for the labor. I said, "they must be joking" the labor cost more than my sliderz. Anyways, I then tried a mom and pops muffler shop, the shop looked descent but they still charged a bundle to get it welded. During my visit to this shop, I saw some flanges, I asked the guy if I can try to fit the flanges on the legs of the sliderz. Wallaa, they fit. I thought that these will be a good addition for extra support. Instead of putting flat metal plates, I can actually fit the flange inside the legs and weld it.

Finally, I found a local muffler shop that will weld the sliderz for only $50 dollars. I was kind of hesitant but I spoke to some customers while waiting for him and they said he does a good job. So after contemplating, I decided what the hell just do it. Actually, he did a pretty good job welding the sliderz. Important: If you get these sliderz and have a stock fender flare like mine, be sure to have him spot weld first to insure proper alignment and to test if you are still able to open the doors. Almost made the mistake not to test the door out because at first we got the sliderz up so high in an angle that the bottom of the rear door rubbed against the sliderz while opening the doors.
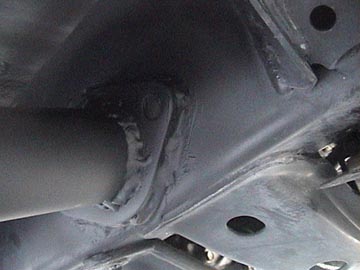
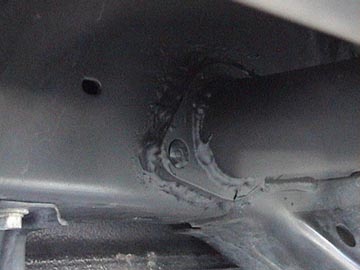
The next week, he actually told me to come back so he can put some gussets for extra strength. You know what, he did for "Free". That was pretty cool because not only there is flange welded, there will gussets for extra strength for free.

Also note that I decided not to cut the pinch seam because I think it was not necessary. I put about 1/4" gap between the seam and the legs.
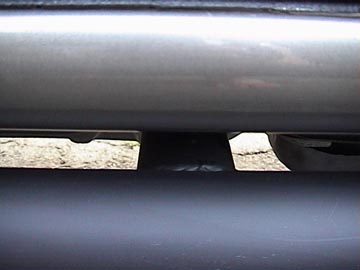
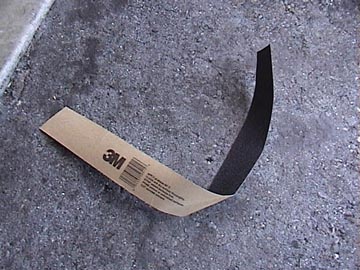
After the welding, I took it home and cleaned it up. I then put some non slip sticker sand paper to cover the rails. I used about 50" inches each side. This will insure that when it is wet, I will not be slipping and hurting my shin. The non slip sand paper cost me about $12.00 both side. Installing was pretty easy, I recommend another set of hands to insure a proper aligned straight fit. The pair of hands to hold one end and my your pair to hold the other end. The cool thing about the material is that you can mess up but still peel it off without ruining the paint and the material. I guess it was my over coat. hehehehe


Below are some pics of the final product on my 4runner.
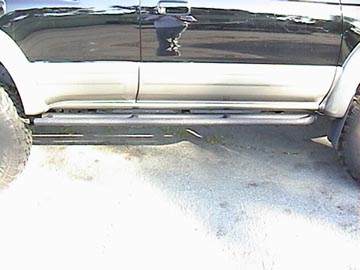
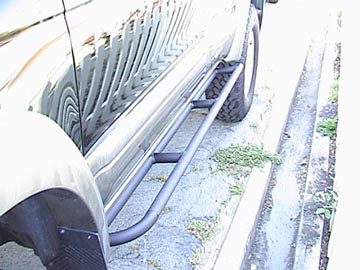
Test Drive: The first thing I noticed that the truck seemed to be a little of stiff. I think, the sliderz took some of the flexibility away. Overtime, I got used to it. So far, there is no rubbing and banging sound.
Hi-lift Test: I've tested the SliderZ using my Hi-Lift jack. So far so good, I was able to lift the entire side without any problem. However, if I need to lift to change a tire, I will lift a portion at a time. Better be safe than sorry.
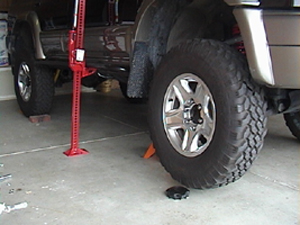
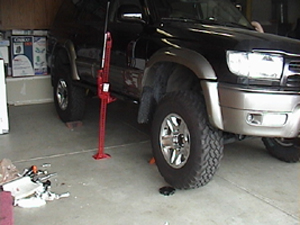
Off-Road Test: Coming Soon!!!!
Worries: I hope all the rumors I've been reading is not true. It is not recommended to weld something on the frame because it might crack. Or someone actually hitting me from the side. I think I get hit from the side, hopefully wit will not bend the frame. I pray that it will never happen.
Back to My 2000 4runner